I wanted to
make a quick but impressive looking dessert for Valentine’s day which put a
twist on the usual Blackforest flavour combination. I've added salted caramel
and combined frozen cherries and fresh cherries for a mixture of textures. The
marbled chocolate shards are really easy to make, and add a decorative edge.
The best part of this dessert is that everything can be prepared in advance,
and then the components can be assembled very quickly at the last moment before
serving.
I always try and make some kind of plan before I make a cake, so I thought I'd include my scribbles in this blogpost as well!
~
Blackforest Pavlova
You will need:
For the meringue
- 8 egg whites
- 230g caster sugar
- 230g icing sugar, sifted
For the decoration
- 225g fresh cherries
- 200g milk chocolate
- 400 white chocolate
For the
filling
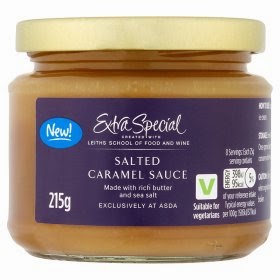
- 200g salted caramel - (I used ASDA Extra Special salted caramel sauce, but you could make your own)
- 600ml double cream
- 350g frozen morello cherries
- 2 tbsp caster sugar
Method:
For the
meringue
- Preheat the oven to fan 100°C and line 4 baking sheets with non-stick greaseproof paper.
- Tip the egg whites into a bowl and beat with and electric whisk until they form stiff peaks.
- Begin to add the caster sugar, a spoonful at a time until fully incorporated. The meringue should look thick and glossy.
- Sift a third of the icing sugar into the mixture, then fold it in. Continue to sift and fold in the remaining icing sugar a third at a time.
- Divide the mixture between the 4 trays, spreading the mixture out into rounds.
- Bake for 1 1⁄2hours or until the meringues sound crisp when tapped underneath and are a pale coffee colour.
- Leave to cool on the trays or a cooling rack.
- Cover 3 baking trays in cling film and keep to hand.
- Melt the white and milk chocolate separately in a bain-marie.
- Once melted, divide the white chocolate between the three trays equally and pour over. Spread the chocolate into a thin layer with a spatula.
- Drizzle the milk chocolate over the white chocolate at random.
- Using the handle of a teaspoon, make “swirly” patterns in the chocolate to create a marble effect.
- Leave the chocolate to cool in the fridge.
- Once cooled, break into fragments of different sizes and shapes. There is no accuracy to this, the rougher the better!
- Set the shards aside until decoration.
(Unfortunately
I forgot to take a picture of this stage, but the chocolate marble shards can
be seen in the final photos)
For the
filling
- Using an electric whisk, whip the cream until softly whipped. Return to the fridge until required.
- Place the frozen cherries into a saucepan and heat on the hob until fully defrosted.
- Strain the cherries, retaining the liquid. Place the cherries aside and return the juice to the saucepan.
- Add the caster sugar and heat very slowly until a thick syrup is formed. Place this aside until required.
(You could even add a dash of cherry brandy to the reducing syrup for a more grown-up take on the dessert)
Assembling
the dessert
- Place one meringue layer on a plate and cover with a layer of cream, followed by salted caramel and finally a drizzle of the cherry syrup.
- Dot one third of the frozen cherries all over (as there will be none on the top layer).
- Place the next layer on and repeat the filling with cream, caramel, syrup and cherries.
- Repeat until the final layer is placed on the top.
- Cover this with the remaining cream and then “stud” it with the fresh cherries.
- Then, stand some of the chocolate shards in the cream on the surface and stick others horizontally between the layers of meringue into the cream filling.
- Finally, drizzle with the remaining salted caramel and cherry syrup and serve!
You’re
finished! This dessert is best eaten in the first 2 days after serving, as the meringue
may start to get a little soggy (but if you’re anything like me – the dessert won’t
last two days anyway!)
Love, Chloe xxx
~ Follow me on Twitter @CrumbsCakeBlog ~


No comments:
Post a Comment